Creating a Document in Microsoft Word
Microsoft Word is a versatile word processing application that allows you to create a wide range of documents, from simple notes to complex reports and professional documents. In this guide, we'll walk you through the steps to create a document in Microsoft Word.

1. Launch Microsoft Word
Begin by opening Microsoft Word on your computer. You can typically find it in the Start Menu or by searching your computer's applications.
2. Choose a Template (Optional)
If you want to start with a pre-designed layout, you can choose a template. Microsoft Word offers various templates for different types of documents, such as resumes, letters, reports, and more. Selecting a template can save you time and give your document a professional look.
3. Create a Blank Document
If you prefer to start with a blank canvas, you can create a new blank document by selecting "Blank Document" or "New Blank Document" from the available options. This will open a new, empty document ready for your content.
4. Add Text and Content
Now it's time to add your content. Click in the document and start typing. You can add text, headings, paragraphs, lists, and more. Use the formatting tools in the Ribbon (located at the top of the screen) to format your text, change fonts, adjust sizes, and apply styles.
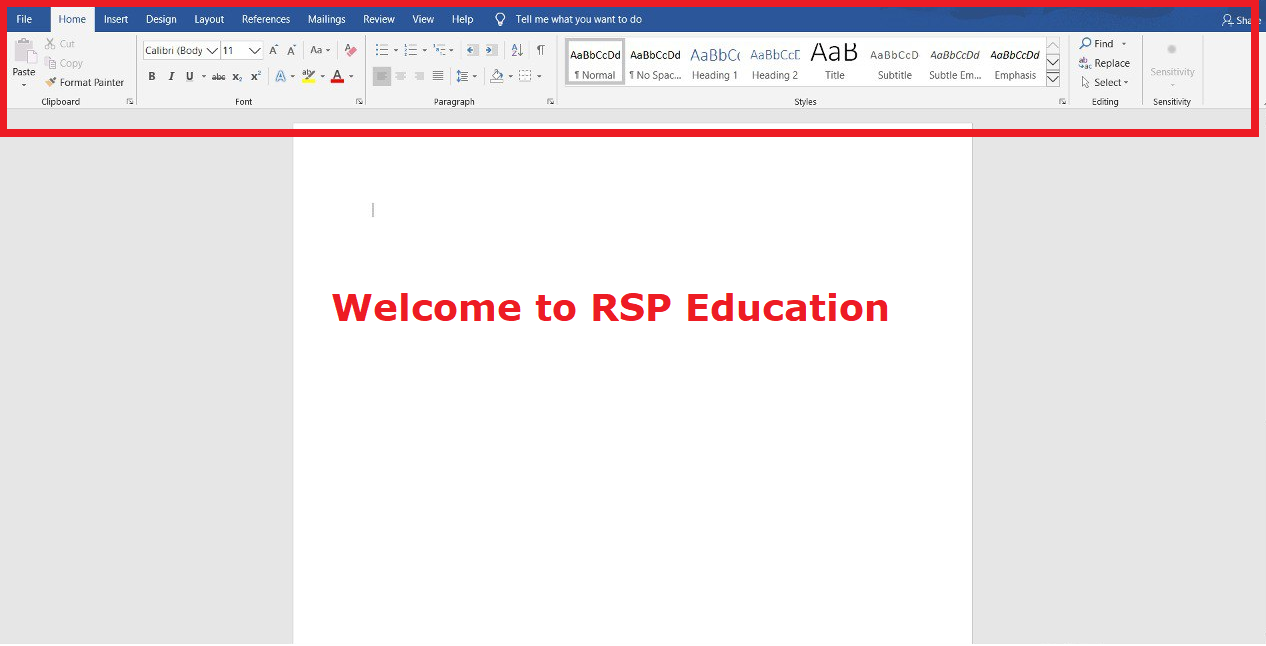
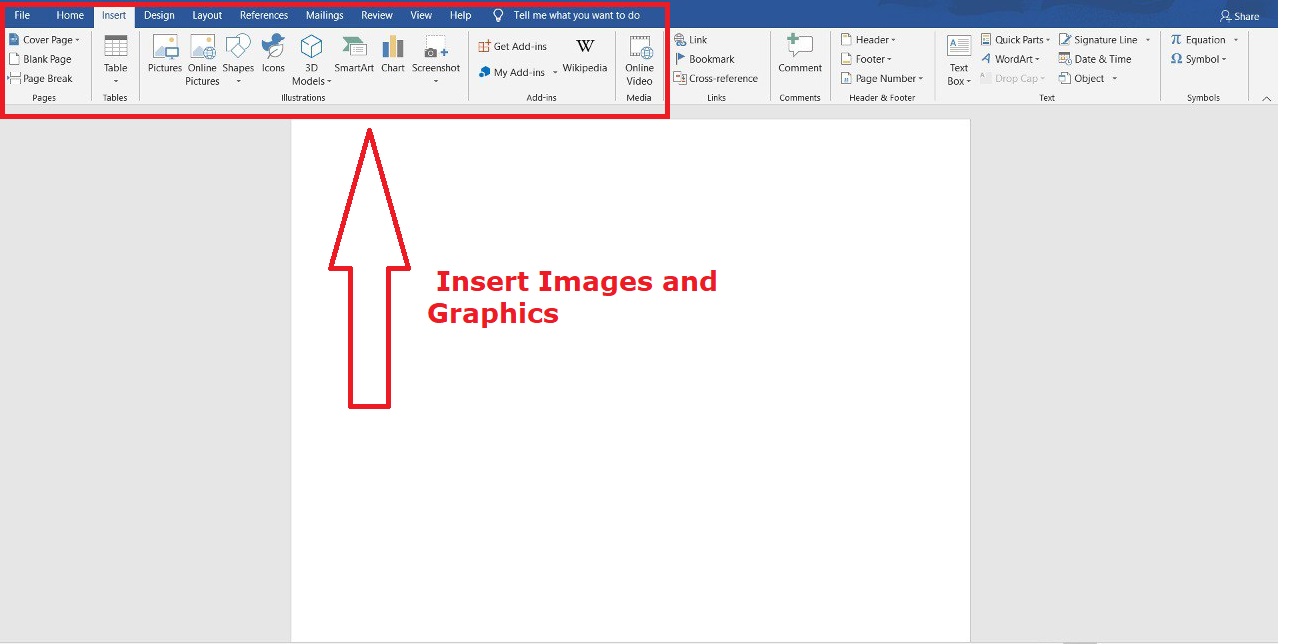
5. Insert Images and Graphics
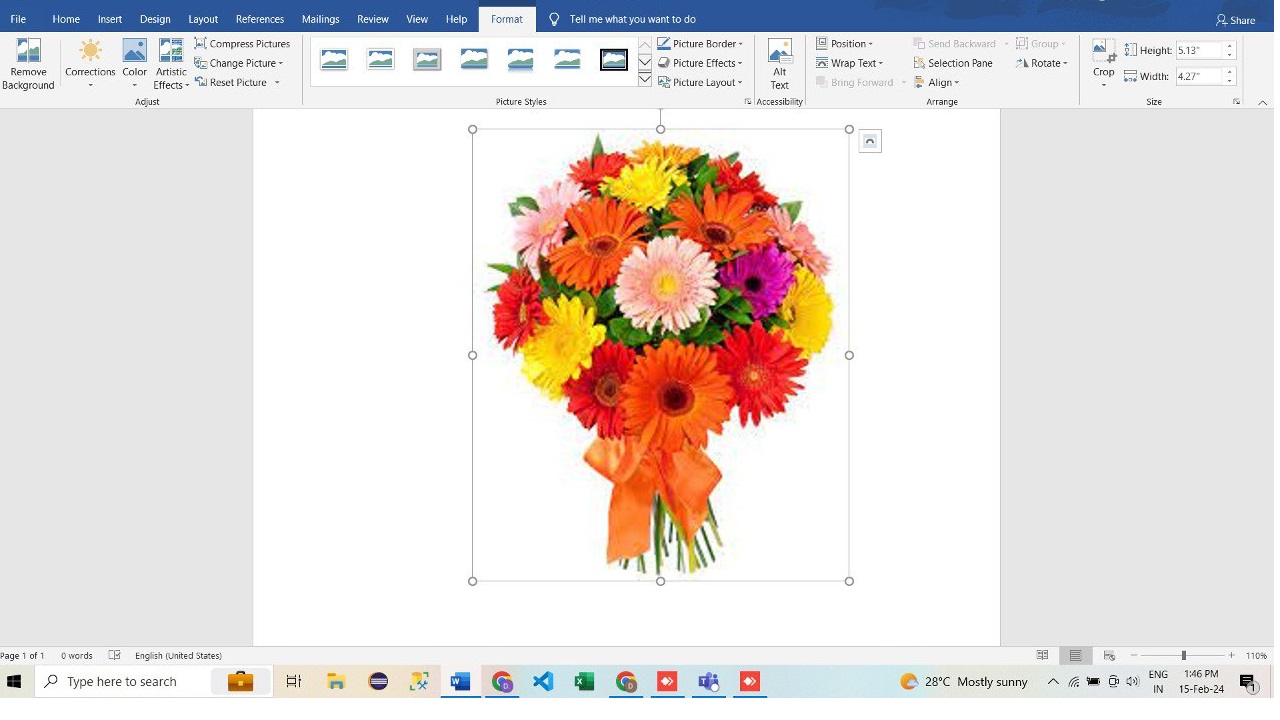
If your document requires images or graphics, you can easily insert them. Click the "Insert" tab in the Ribbon and choose "Pictures" or "Online Pictures" to insert images from your computer or from online sources.
6. Save Your Document
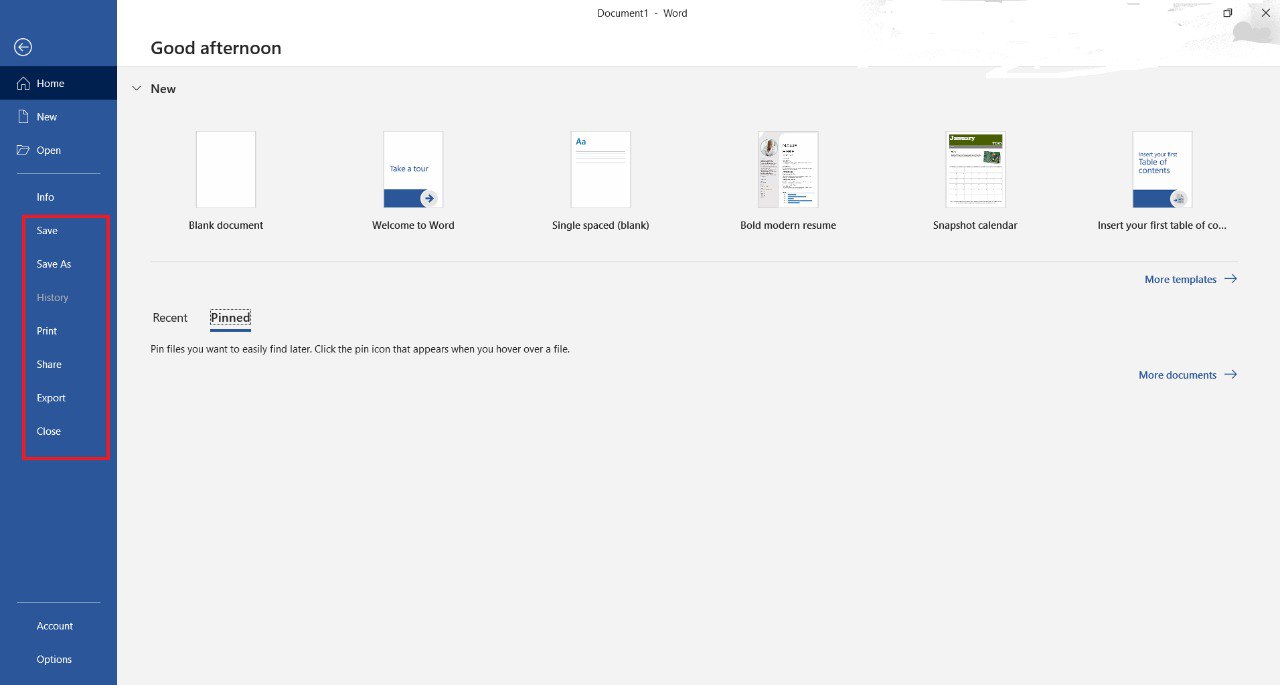
It's essential to save your work regularly to avoid losing it. Click on the "File" tab in the Ribbon, then select "Save" or "Save As" to specify a location and filename for your document. You can choose to save it to your computer or cloud storage like OneDrive.
7. Format and Style Your Document
Use the formatting options in Word to enhance the appearance of your document. You can adjust margins, apply styles, create headers and footers, add page numbers, and more. Explore the formatting tools in the Ribbon to make your document visually appealing.
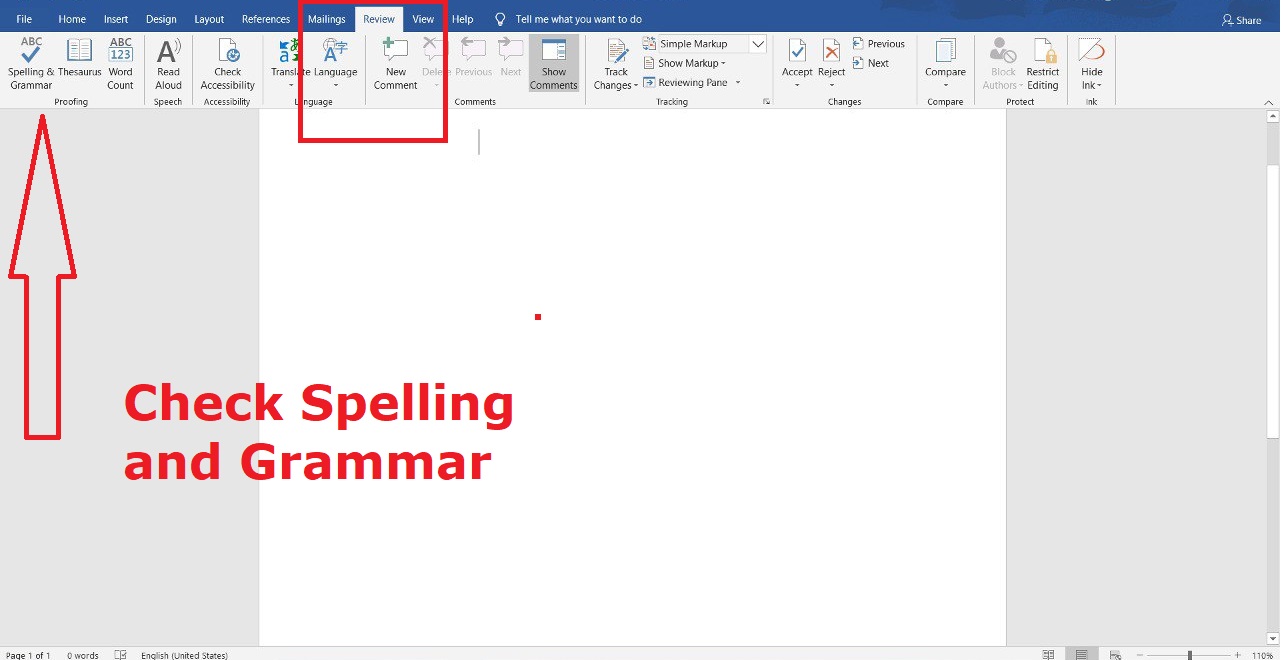
8. Check Spelling and Grammar
Before finalizing your document, it's a good practice to check for spelling and grammar errors. Word provides built-in proofing tools that can help you identify and correct errors. Look for the "Spelling & Grammar" button in the Review tab.
9. Review and Edit
Review your document for accuracy, clarity, and consistency. Edit as needed to refine your content and improve readability.
10. Save and Share
Once you are satisfied with your document, save it one more time and consider sharing it. You can share your document via email, print a physical copy, or save it in a format suitable for sharing, such as PDF.
Congratulations! You have successfully created a document in Microsoft Word. Whether it's a school assignment, a professional report, or a personal project, Microsoft Word provides the tools you need to craft well-organized and polished documents.
Leave a comment