Drop Cap in MS Word
Drop caps are a beautiful and decorative way to start a paragraph in your Microsoft Word documents. They add a touch of elegance and style, making your documents stand out. Here's how to create a drop cap:

Step 1: Select Your Paragraph
First, open your Microsoft Word document and select the paragraph to which you want to add a drop cap. Click anywhere in the paragraph to set the insertion point.
Step 2: Access the Drop Cap Option
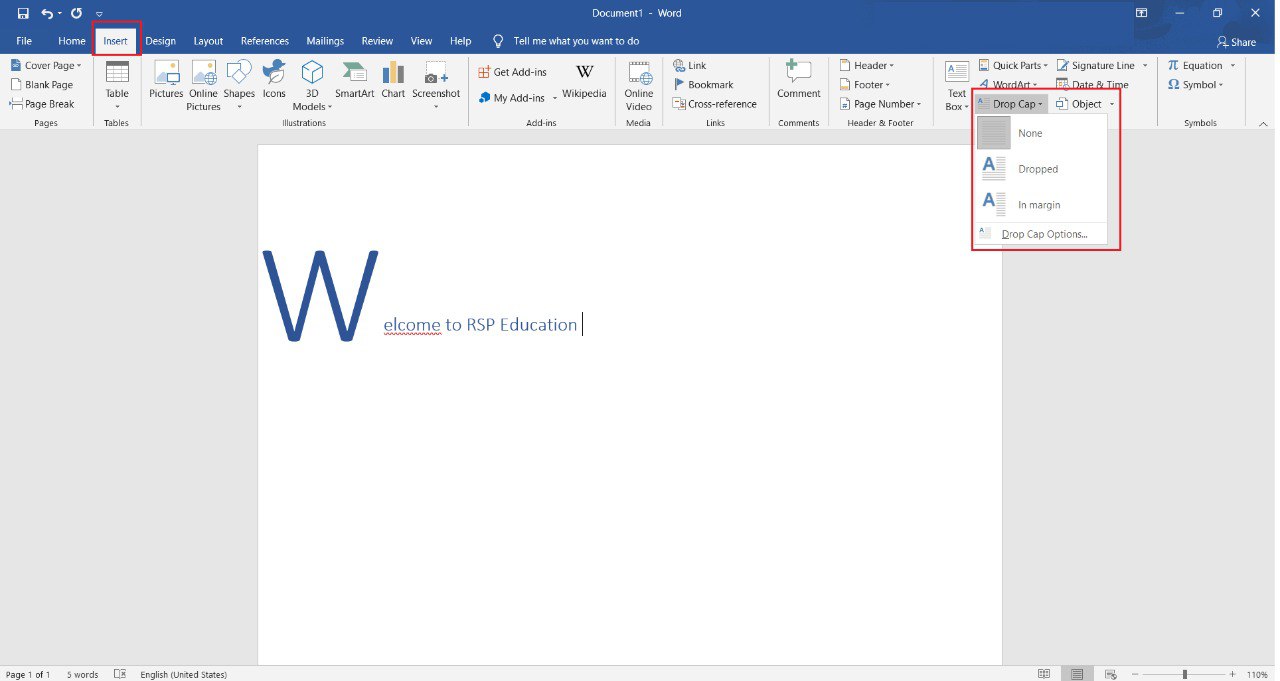
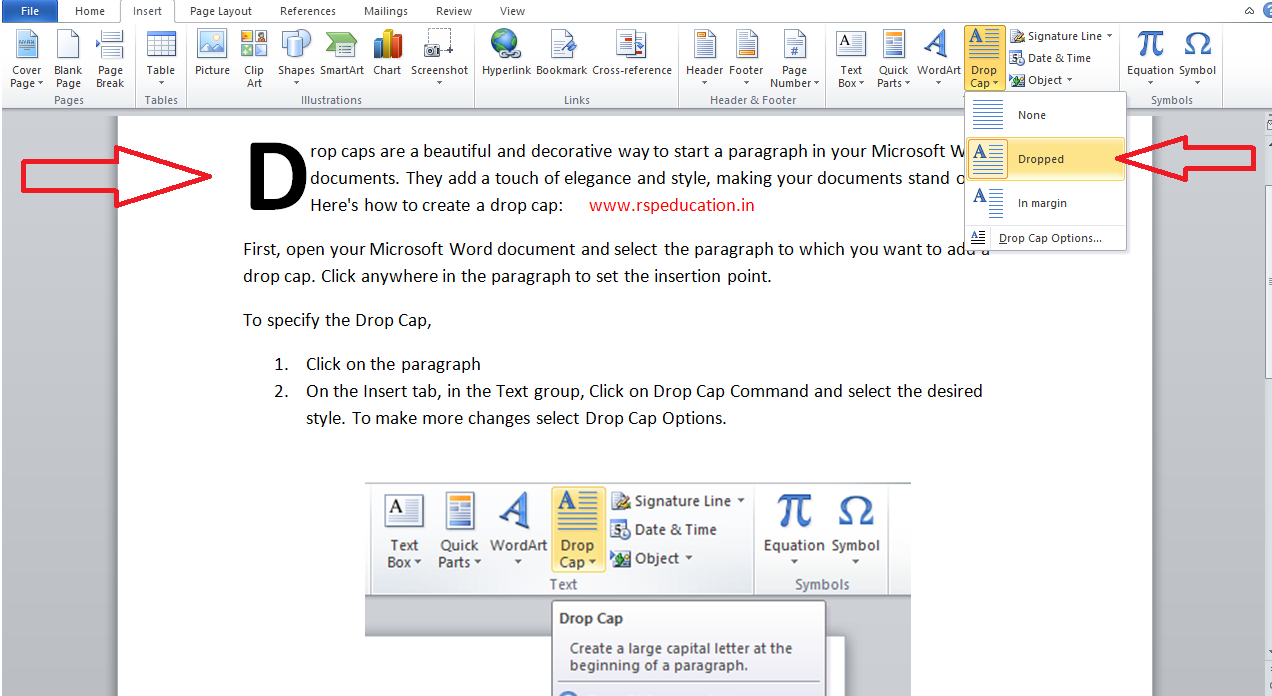
Next, go to the Insert tab in the Word ribbon. In the Text group, you'll find the Drop Cap option. Click on it to reveal a dropdown menu with three choices:
- None: This option removes any existing drop cap.
- Dropped: It adds a large dropped initial letter to your paragraph.
- In Margin: This option places a smaller capital letter in the margin next to your paragraph.

Step 3: Choose Your Drop Cap Style
Select the drop cap style you prefer. If you choose Dropped, Word will automatically format the first letter of your paragraph as a drop cap. If you select Margin, the capital letter will appear in the margin beside your paragraph.
Step 4: Customize Drop Cap (Optional)
If you want to further customize the drop cap, right-click on it and select Drop Cap Options. Here, you can adjust the number of lines to drop and the distance from the text. You can also choose a different font or size for the drop cap if you like.
Step 5: Enjoy Your Drop Cap
That's it! You've successfully added a drop cap to your Microsoft Word document. It's a small but stylish detail that can make your documents look more polished and professional.
NOTE:
Experiment with drop caps to find the style that suits your document best. Whether you're working on a formal report, a creative piece, or anything in between, drop caps can add an extra layer of visual appeal to your text.
Start using drop caps in MS Word today to enhance the visual impact of your documents.
Leave a comment