Borders and Shading in MS Word
Microsoft Word offers a range of formatting options to make your documents visually appealing and organized. One such feature is Borders and Shading. Borders and shading allow you to emphasize specific content, create tables, or highlight important sections of your document.

Adding Borders to Text or Paragraphs
To add borders to text or paragraphs:
- Select the text or paragraph you want to apply borders to.
- Go to the Home tab in the Word ribbon.
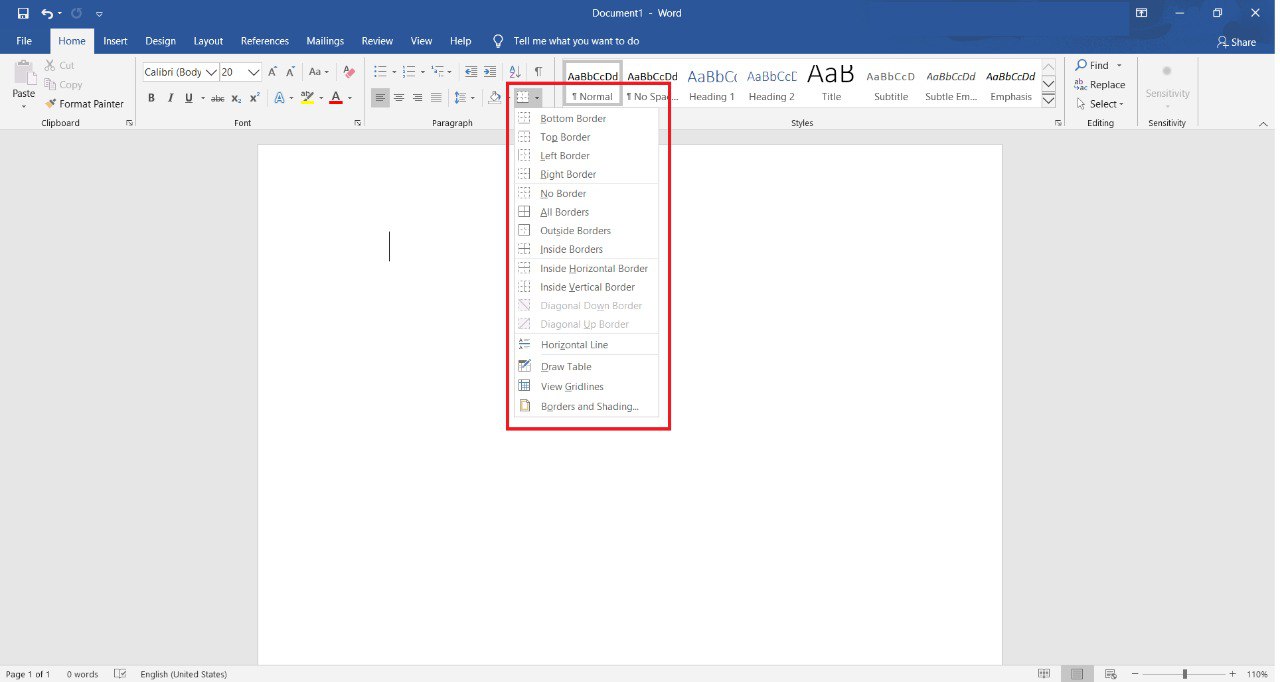
- Locate the Borders button in the Paragraph group.
- Click the drop-down arrow next to the Borders button to access border options.
- Choose from border styles such as None, All Borders, Top Border, Bottom Border, and more.
- You can also customize border color and line style by clicking Borders and Shading at the bottom of the menu.
Shading Paragraphs
To add shading to paragraphs:
- Select the paragraph you want to shade.
- Go to the Home tab in the Word ribbon.
- Locate the Shading button in the Paragraph group.
- Click the drop-down arrow next to the Shading button to choose a shading color.
- The selected paragraph will now have a shaded background.
Creating Tables with Borders and Shading
If you want to create tables with borders and shading:
- Click the Insert tab in the Word ribbon.
- Click Table and select the number of rows and columns for your table.
- Once the table is inserted, you can apply borders and shading to individual cells or the entire table using the techniques mentioned above.
NOTE:
Borders and shading are powerful tools in MS Word that help you organize your content, improve readability, and create visually appealing documents. Experiment with different styles and colors to achieve the desired look for your documents.
Leave a comment